Sunday, September 30, 2012

TuTu Tutorial

Here, I've been a grandmother for all of 9 weeks,
and I have yet to make my baby granddaughter a tutu -
those lighter than air, diaphonous, totally frivolous, fun, frothy skirts in which little girls delight.
 
 
So, I set out to make matters right.
 Of course, I was supposed to have been starting on her Halloween costume,
 which, by the way, is not the tutu. 
 Oh well, another day.
 
 
Tulle was not one of those things with which I had much familiarity
until girls began to happen upon the scene several years ago.
Now my workshop is littered with rolls and yards of the frothy stuff.
 
This tutu will be pink, white, and purple, since these are the colors I had on hand.
I'm interspersing the tulle with purple and white satin ribbons.
 
The supplies needed for the project are:
rolls of 6 inch wide tulle, sold at craft and fabric stores, and online
satin ribbon (optional)
a piece of elastic cut about 2 inches smaller than the girl's waist 
a needle and thread for sewing the ends of the elastic together
 a pair of scissors,
and a piece of cardboard cut about one inch longer than the length of the tutu.
The length of the tutu will depend on the height of the girl who will twirl in the tutu.
My baby girl tutu will only be about 5 inches long.
 
 
Begin by winding the tulle around the cardboard a good many times. 
 For the baby tutu in these photos, I used 22 pieces of each of three colors.  
The more pieces of tulle you use, the fuller the tutu.   
 
 
Slip a sharp pair of scissors into one edge of the cardboard and run the scissors along that edge, cutting carefully through all layers of tulle. 
 Repeat for each color you plan to use.
If you use ribbon, cut the ribbon in the same manner.


Lay the piece of elastic in front of you.  Fold one piece of tulle in half.  Place the fold under the elastic, with the loose ends at the bottom. 
 
 
 Bring the loose ends up over the elastic and through the loop at the top,
tightening the knot securely.
 
 
Repeat, repeat, repeat. . . .
 
 
When you have almost reached the ends of the elastic,
tack them together with needle and thread.
Then, add a few more pieces of tulle to cover the elastic.
 
 
A tutu fit for a princess! 
 

Thursday, September 27, 2012

The Smile

This evening, my granddaughter smiled at me. 

Were I not so thrilled, I would have cried.

She fixed her huge dark blue eyes upon my face and she smiled at me. 

Not once.

Not twice. 

Three times, the corners of her perfect little mouth curled up at the edges as I talked to her.

It just doesn't get much better than that.


Tuesday, September 25, 2012

It's Beginning to Look a Lot Like . . .


A good many years ago, there was a shop in my little town called The Stitchery.  It was owned by a very accomplished woman who lived just a block away from me.  In her shop, she sold needlework supplies of all sorts.  Each Christmas, she placed a tiny tree filled to overflowing with intricately sewn felt Christmas ornaments in the window.  It was a highlight of my every Christmas to visit her shop where I marveled at the ornaments.  I fell hard for those little beauties and determined that I would have a tree just like that some day.
The shop has long since ceased to exist, and these many years later, I now have a cherished Christmas tree full of handmade felt ornaments.  Every year, I make at least one new ornament for the tree, some years, six or seven.  Each Christmas, with some help from the boys and their girls, the ornaments are tenderly taken out of the tissue in which each is wrapped and placed on the tree.   
The majority of the ornaments that decorate the tree were made from kits by Bucilla. There are a bear family, the Twelve Days of Christmas, Christmas at the Beach, Santa and Mrs. Claus, their reindeer, Scandinavian style ornaments, stockings, snowmen, clowns, animals of every sort, and angels. A recent addition is a gingerbread house, which nestles in the branches of the tree.
  There were, however, a number of years when I was unable to locate the kits, so I began to improvise by designing my own ornaments.  I turned to my children's books and TV shows for inspiration.  That brought to the tree characters such as Big Bird, Oscar, Bert and Ernie,  Snow White and her 7 dwarfs, Mickey, Minnie, Goofy and Donald, along with the cast of the Wizard of Oz.
Even Ivey and Orion made their way to the Christmas tree. Ivey is wearing the Christmas sweater, blue jeans, and topsiders.  Orion is wearing his favorite Ninja Turtle pajamas.  They think it a little weird that I turned them into Christmas ornaments, yet each Christmas they eagerly search for themselves on the tree.


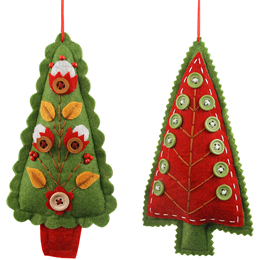
Having become a grandmother this past July, I would like to craft, for my granddaughter, a felt ornament each year.  I began to look for inspiration last night, and was thrilled to find so many ideas.  Etsy features the work of many gifted artists who craft felt ornaments.  The ornaments are lively, bright and modern. 


These adorable trees were sold by The Container Store.


Pinned Image

Bright birds by Dimensions Needleworks would be a welcome addition
to any Christmas tree.


Pinned Image

These ornaments were made in Budapest, that being the only word I was able to read on the website.  I especially love the deep, rich colors and the beading.


Pinned Image

These whimsical ornaments will absopositively make their way to my Christmas tree
this year. They will bring brightness, fun, and they look super easy to make. They may need a shot of bling with a few sequins along the edge of the bulb holder.  We'll see.


The mistletoe, below, is such a soft, modern ornament.  And, it requires no sewing.  What could be easier?  Draw the design, cut it out, hot glue on the berries, and tie with a bright red ribbon. It would also be easy to produce a holly ornament in this same manner.

The partridge and the pear tree, however, stand at the other end of the skill spectrum, requiring both sewing and embroidery skills.

Pinned Image          Pinned Image

Lastly, I came across this fabulous collection of fanciful birds. I think they are charming.

Pinned Image
I don't know what ever became of the wonderful woman who owned the Stitchery. I wonder what she would think of the range of creativity that exists today.  I am inspired.  Much to think about as I move toward a design for baby granddaughter's first Christmas ornament.


Tuesday, September 18, 2012

Monday, September 17, 2012

The Old River Road - Part 2

So, let's begin where yesterday's post left off.  It appears Blogger is up to speed this evening.


A glorious September day calls for an adventure.
I've always wanted to walk on the old wagon road, known as the Old River Road,
just outside my little town.


However, this sign and rusting gate stand in my way.
There are no signs indicating I should not trespass.


Closer inspection reveals the gate is sorely in need of repair. 
It's really not a very serious gate.
I spy a hole in the wire, through which I can squirm.
And, so I do.
 
 
The sign looks a lot less forbidding from this side.
Once inside, I discover all I had to do was swing open the gate.
It was more fun getting in the hard way.
 
 
As I begin to make my way down the road,
 regularly shaped stones laid in a straight line begin to appear among the gravel and weeds.
This must be part of the Old River Road, 
which long ago served as a road for carriages and wagons. 
 
 
The huge lime green fruits of the osage orange tree (also known as hedge apple)
hang above my head.  The osage orange tree was first planted in Ohio in the 1800s.
It is found in fields and along fencerows.


More of the stones become visible. 
I have learned that the stones were cut and laid end to end
to provide a stable roadbed for the wagons it carried.
 
 
The rich purple of ironweed is gorgeous
against the ripening golden field of soybeans.


Two clearly defined parallel lanes of stone, both bearing grooves, appear.
I can imagine horse-drawn wagons clattering across the stone road.
 
 
The grooves made by the wheels and smoothness of the stone amaze me.
I hike onward, anxious to walk the entire length of the road.
 
 
Gravel and weeds begin to overtake the roadbed.
It is now impossible to see the stones. 


This cheerful beauty, blooming alongside The Old River Road,
 is a wild sunflower, also known as helianthus decapetalus.

 
As I make my way deeper along the road, it becomes choked with weeds,
poison ivy being one of them.
I decide to turn back, as I am not dressed to do battle with poison ivy.
 

I am sad not to have trekked the entire length of the road.
The rest of the Old River Road adventure will have to wait
 until a killing frost has had its way with the weeds.
In the meantime,
I take with me images of a beautiful southern Ohio September Sunday
and the thrill of seeing the old stone road.
 
I will return to the Old River Road in the fall.
Leave me a comment if you'd like to go with me.
I'd welcome the company.


Sunday, September 16, 2012

The Old River Road

A glorious September day calls for an adventure.
I've always wanted to walk on the old wagon trail outside of my little town.
 
 
However, this sign and rusting gate stood in my way. 
 
Stay Tuned.
It appears Blogger is standing in my way, too.
My remaining photos and text have mysteriously disappeared.
We'll have our journey tomorrow.
Please come back then.
Thanks.


Thursday, September 13, 2012

Jeni's

After a doctor's appointment in Columbus, during which the news was all good,
my brother and I found ourselves happily unoccupied in the middle of Thursday afternoon,
relieved, hungry, and in no hurry to do much of anything.
I suggested a ride down High Street to take in the sights.
We passed through the OSU campus, then on to the Short North,
where I told brother there was some great ice cream to be had.
His eyes lit up.  He has not had much to eat that tastes very good for some time now.
We were soon out of the Suburban and on our way to Jeni's.
 

Ivey and Sister Golden Hair first introduced me to Jeni's. 
They rave about the ice cream, with good reason. 
Fresh ingredients, quirky flavors, good to the very last spoonful.
 

Colorful pennants greet you as you enter the shop.
 
 
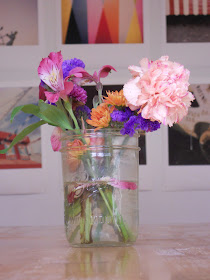
Fresh flowers, bright art, and simple furnishings grace the space.
 
 
The menu is simply written on a chalkboard.
The employees are friendly, knowledgable, and passionate about their product.
They offer samples of the ice cream on tiny white spoons,
all the while telling you about the ice cream you have chosen to sample.
 
 
After sampling a couple of flavors, brother decided on a triple serving of
Salty Caramel, Ugandan Vanilla Bean, and Black Coffee.
 
 
My choices, Mango Lassi,  the bright yellow ice cream pictured above,
and Roasted Strawberry Buttermilk.
 
 
Brother offered me a taste of, what I first thought was lime water. 
Turns out it was cucumber water - very refreshing.
 
 
 Brother and I retreated to a corner of the shop
 to enjoy our ice cream and  the sunny September afternoon.
Thanks Jeni's for making a good day just that much better.


Tuesday, September 11, 2012

Rye Onion Rolls

Brrrr!  Better Half left the bedroom window open all night.  46 degrees doesn't feel cold when you are snuggled under a heap of warm blankets.  However, it was downright chilly as I made my way from the bed to the shower this morning.

The cool temperatures, the crisp clean air, and the leaves that have begun to rain down from the trees around the North Forty make me realize fall is not far behind.  My thoughts turn to hearty soups and homemade bread.


I found this fabulous recipe for rye onion rolls at The Irish Mother blog, as I was looking for recipes for rye breads and rolls the other day.  I followed the directions diligently, and the resulting rolls were beautiful, delicious, and surprisingly light textured.  While it takes some time to shape the rolls, it was fun.

Let's make some rolls!

1 cup milk
2 tbsp. honey
1 tsp. salt
3 tbsp. butter
2 pkg. active dry yeast
1/2 cup warm water
3 cups white flour
2 tbsp. caraway seeds
6 tbsp minced onion
1 to 1 1/2 cups rye flour
1 egg
2 tsp. water
1 tbsp poppy seeds

Scald milk in a small saucepan.  Pour it into a mixing bowl along with the honey, salt and butter. Stir to mix ingredients and cool to lukewarm.  Dissolve yeast in the warm water and add to the lukewarm milk mixture.  Add white flour and beat for one minute.  Add caraway seeds, onions and enough rye flour to make a dough that is firm enough to knead.  Knead dough by hand or with mixer using dough hook for 8 minutes. Place dough in a greased bowl, turning once to coat. 
 Cover and let rise for about one hour, or so.


Punch dough down and divide in half.  
Roll each half into a long 18 inch roll about 1 1/2 inches in diameter.
 
 
Cut each roll into 6 - 3 inch pieces.


Roll each 3 inch piece into a skinnier rope about 12 inches long.
 
 
Tie the dough rope into a knot.  Tuck the top end at the right underneath.
Tuck the bottom end at the left over the top.
 
 
Place the rolls on a parchment lined baking sheet or on a greased baking sheet about 2 inches apart.  Cover with kitchen towel and let rise until doubled, 45 minutes to one hour.
 
 
Meanwhile, preheat oven to 400 degrees.  Mix water with egg. 
Brush tops of rolls with egg mixture, sprinkle with poppy seeds,
 and bake in preheated oven for 12 to 15 minutes.
 
 
Enjoy!