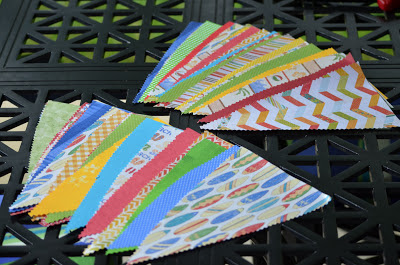
I have long admired the garland buntings I see displayed on Etsy. They lend a charming, rustic air to the spaces they decorate, be it a child's room, a wedding venue, a birthday party. These are three of my favorites.
Anchors aweigh!!!
This contemporary dotted bunting provides a nice contrast to the weathered siding on which it is displayed.
This bunting gave a bright punch of color to an otherwise white interior at Jeni's, a splendid ice cream shop in Columbus, featured in this blog last September.
I thought it might be fun to try my hand at a garland bunting to decorate my otherwise fairly staid back porch. Two inspirations for my bunting - a bright bouquet of flowers that already adorned the table and a beach vacation in August. Before devoting a great deal of time and energy to fabric, I thought I would first try a paper bunting, moving on to fabric, if I like the bunting.
This is an easy project to complete. Scissors, ribbon or fabric binding, paper, and a sewing machine are the only supplies you will need. Well, that, and a little time. Well, plus a trip to Wal-Mart, if you do not have absolutely the perfect shades of red and blue papers. Better Half graciously agreed to accompany me to Wal-Mart in search of the perfect specimens. Found a whole book of them, much to my surprise.
Cut triangles to the shape and size you desire. Where you plan to use the garland bunting will dictate the size of the individual pennants that make up the garland. The long side of the triangles in my pennants were 9 inches, while the short side was 5 inches.
Once you've cut many triangles, lay them out on the floor in a pattern you like. In my case, I wanted a fairly even distribution of color and pattern. Cut a few extras. There will be some colors and patterns you just do not like as you lay them out.
Take the pile of triangles to the sewing machine with the ribbon you plan to use, in my case, 7/8 inch white grosgrain ribbon. Seam binding would work equally well. About 18 inches in from the end of the ribbon, place your first pennant about halfway into the ribbon. Bring the top half of the ribbon over the front of the pennant and begin to sew, using a basting stitch. Add the next pennant at the spacing you determine appropriate for your project. I used a fairly tight spacing between the pennants. Continue on, until you have added all your pennants, leaving a length of about 18 inches of ribbon, past the last pennant you sew. The 18 inches of ribbon on each end gives you a means by which to hang the garland bunting.
Here is the paper garland bunting hanging in its Fourth of July place of prominence.
And, here is the inspiration bouquet, along with the bunting it inspired.
Happy Fourth of July!
Hoping the rainy weather did not dampen your spirits or enthusiasm
for this mid-summer celebration day!


No comments:
Post a Comment